|
|
|
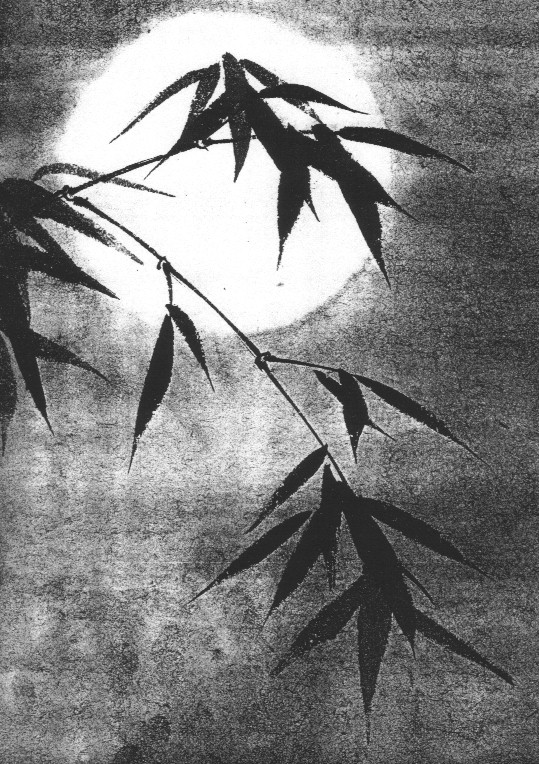
Students will create a landscape, similar to the one shown below by using just a few basic strokes of the brush. The teacher will demonstrate each stroke and allow the students to practice on newsprint before beginning their final painting.
 Bamboo
in the Moonlight
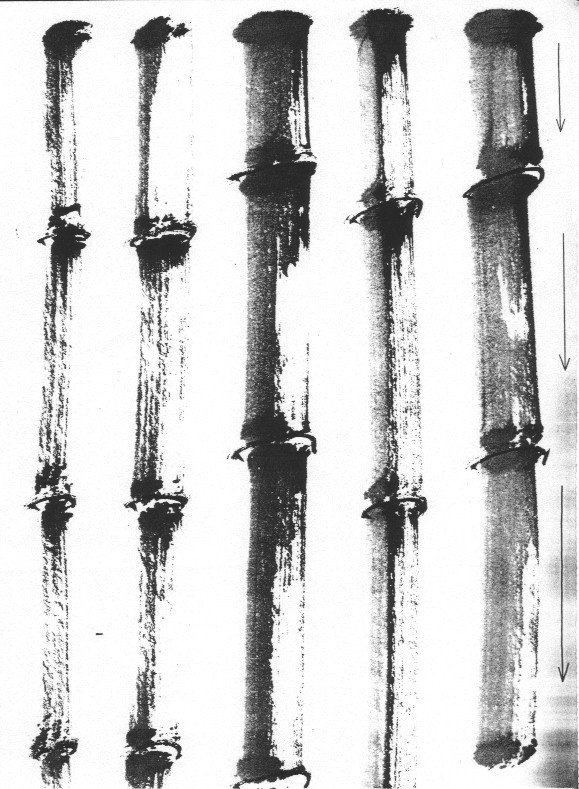
Trunks
Brushes are held in the slant position for this stroke. Only a small amount of ink is needed, as you want the brush to be slightly dry in order to make the trunks look "woody". Move the brush a few inches, then leave a small gap and resume the stroke. This gives the bamboo a "sectioned" look. Use the tip of the brush to add the "nodes" between each section. The trunks look like this:
. The
strokes are made all in one direction.
You can get different sized trunks by varying the amount of the brush tip that is pressed to the paper.
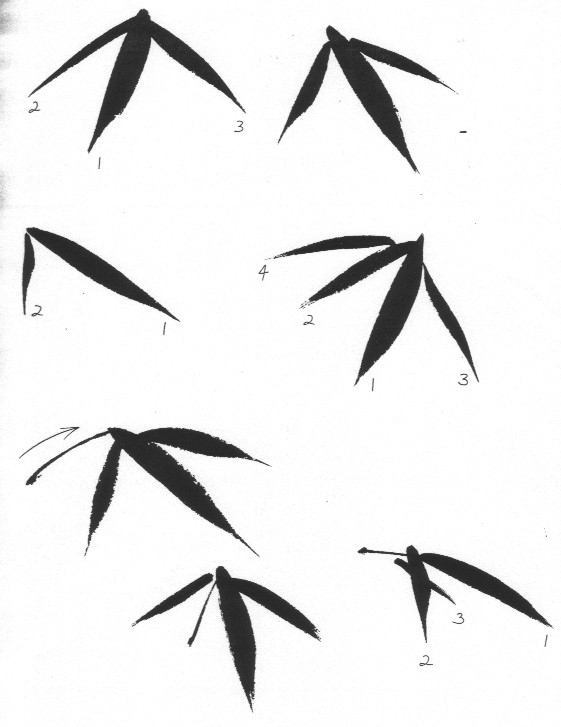
Leaves:
Each leaf is completed in one stroke.
The motion is press and lift - press down at the beginning and lift up
at the end to make the pointed shape at the tip. Have students practice
slanting the leaves in different directions - rarely in nature are leaves
pointed straight out like a star! When they have mastered the leaf
stroke, have them make some leaf groups like the ones shown below.
Stagger the leaves slightly, and leave the side leave smaller than the
main leaf in the group.

After the papers have dried, they will go back and do a very light wash, leaving the "moon" white. An inverted tupperware bowl is a good guideline for the moon - they can move it around until they find the right space, then do their wash all around it.